
Do you love spending time in the kitchen? If you’re like most people, the answer is probably yes! The kitchen is one of the most important rooms in a home. It’s where we cook our food and gather with family and friends. One of the best ways to improve your kitchen is to add a kitchen island. Kitchen islands provide extra counter space and storage, and they can also be used as a dining table or breakfast bar. In this blog post, we will show you how to build your own kitchen island using common tools and materials. Let’s get started!
DIY Kitchen Island: Step-by-step Guide
- Step One: Choose the Design
Wondering if you should go with an open or closed-shelf design for your kitchen island? We have the answers! Use these questions to guide your decision and then consult us again when it comes time finalize that design. What kind of space does this arrangement require, what materials would best suit those needs (referencing storage), how much seating capacity do we want our new seats offering up aboard….all things considered I’m sure once everything is set in stone – whether through decoration choices like colors & styles; available furniture pieces; or appliances and amenities – your kitchen island will boast its one-of-a-kind look that is all you.
- Step Two: Choose the Placement
The second step is choosing your design and layout. Choose a spot in your kitchen and measure out the location of your island design. You’ll be able to see how much floor space will be taken up, as well as ensure that all dishwasher, oven, and refrigerator doors have adequate clearance to open. When you’ve finished, wind the string back onto the spool and cut it if desired. The last placement is chosen, and markers are used to indicate the corners so that the cabinets may be quickly positioned in their proper places.
- Step Three: Gather materials and tools
A few things to consider when stocking up on supplies for your DIY project: How large of an area are you looking to cover? Do you need a specific type of wood or laminate? How many cabinets will you be needing and what style? Will the countertop be a solid piece or granite slabs? Do you have all of the tools necessary to complete this project (or are they readily available)?
The next step is building your frame. This will be the skeleton of your kitchen island. You can use either wood or metal for this part; just make sure that everything is square and level.
- Step Four: Build the base
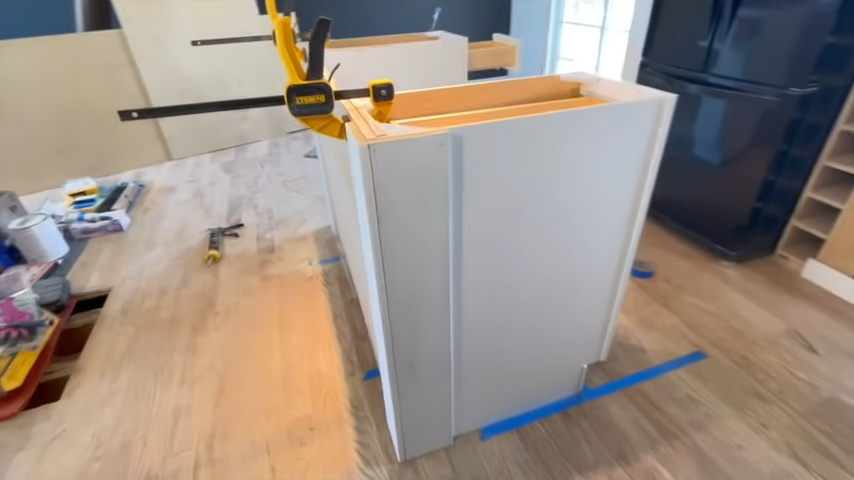
The first step is building the base cabinet that your island will sit on.Cut the boards to length for the bottom rails and bottom ends, then assemble the base frame by adhering them together with wood glue and flathead wood screws.
Using screws, attach the side panels to each other and then screw in all four legs. Before driving each screw, drill a countersunk pilot hole to prevent the wood from splitting. Secure the back to the base with screws after it’s on. Before attaching the bottom, secure the rear of the cabinet with glue and clamps. This should create a sturdy frame for your island’s base.
- Step Five: Build your cabinets
The next step is building upper and lower cabinets that will attach to the base you just created. To build these, cut four pieces of plywood to size for each cabinet and drill a pocket hole in each corner of one side of every piece (this will be where they’re assembled together). Starting with the bottom cabinet, glue and clamp two sides to the front, making sure that all of the pocket holes face inward. Do not attach the back or top yet.
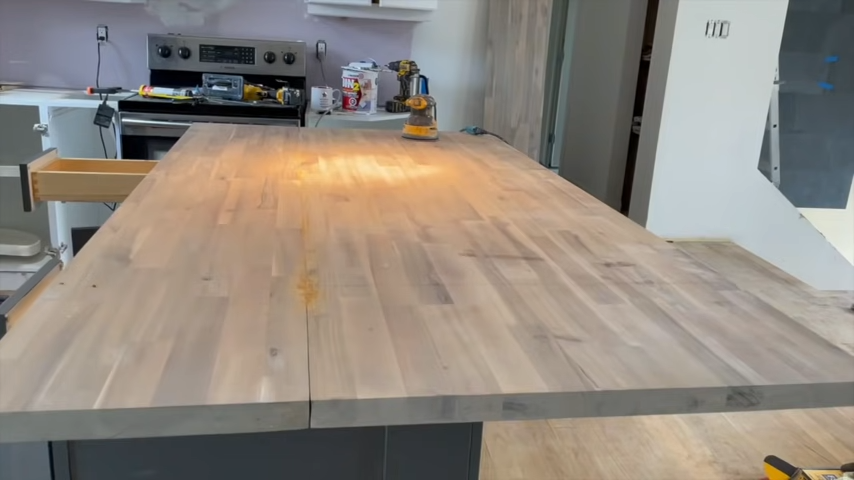
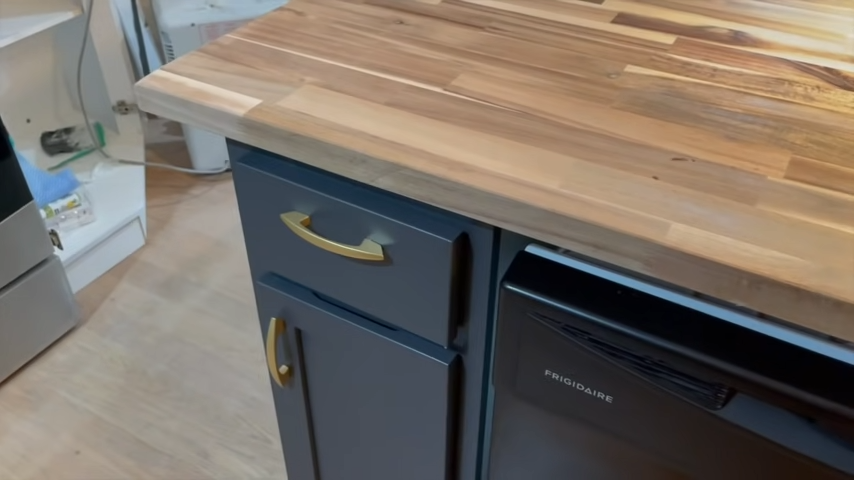
The same process is repeated for each additional cabinet. Be sure to leave a ½-inch gap between each cabinet so you have room to install crown molding or a decorative trim in Step Eight. Once all of the cabinets are assembled, measure and cut the countertop to size. The top should overhang the front by ½-inch on each side. Secure it to the cabinets with glue and clamps.
- Step Six: Install upper cabinets
Now that your lower cabinets are complete, you can install them on the base you built in Step Four. Measure from the floor to the bottom of a lower cabinet and cut four pieces of wood that are ¾-inch thick by the same measurement. Glue and clamp these boards to each corner of your island’s base, then attach your cabinets using screws through pocket holes into their corresponding legs.
To add stability, you can glue and nail a scrap piece of plywood to the underside of your island’s base after installing the cabinets. This will prevent them from shifting or separating over time.
- Step Seven: Attaching the Top
The next step is installing your countertop. Cut out a piece of plywood that is slightly smaller than the dimensions of your cabinet and lay it on top so there’s an even amount hanging over all four sides. Place heavy objects onto each corner to hold everything in place while you screw through them wood from underneath (into the countertop) with four screws per corner.
- Step Eight: Attach the Countertop
Use a drill to make pilot holes in your base cabinet and then use self-tapping screws to attach it securely with an even line of feed through both boards.
- Step Nine: Add decorative molding and facade trim.
In order for it to look truly unique as well as functional, add molding to the island. This is a great way to hide any gaps or irregularities between the cabinets and countertop. You can either buy it pre-made or make it yourself. If you’re feeling ambitious, you can also add facade trim around the outside of your island for an extra touch. This will give it a more custom appearance and help it blend with your decor.
That’s It!
Follow these steps to make a DIY kitchen island for your home, and you’ll have a new piece of furniture in a week or two! Besides, we would like to know what did you think of this article? Did it help you get motivated to build your own kitchen island or give you some new ideas for the design and layout of your current one? Let us know in the comments! We can’t wait to hear from you.